The Ultimate Guide to Baking Fluffy, Moist Cupcakes Every Time
We’ve all been there. You follow a recipe exactly, you preheat the oven, and you wait with excitement, only to pull out a tray of cupcakes that are more like dense, dry pucks than the light, fluffy treats you were dreaming of. Baking the perfect cupcake can feel like a mystery, but it’s not about magic or luck. It’s about science, and once you understand a few key principles, you’ll be able to bake fluffy, moist, and delicious cupcakes every single time.
This guide will walk you through the essential secrets, from ingredients to mixing, that separate a disappointing cupcake from a perfect one.
1. Start with Room Temperature Ingredients
This is the rule you’ll see in almost every baking recipe, and it’s the one most often ignored. Don’t skip it! Using room temperature ingredients (especially eggs, butter, and milk or buttermilk) is the single most important step for a light, fluffy cupcake. When these ingredients are at the same mild temperature, they form a smooth, uniform emulsion. This emulsion traps air in the batter. When that trapped air heats up in the oven, it expands, lifting your cupcake and creating that coveted light, airy texture. Cold ingredients, by contrast, don’t blend well and can result in a lumpy batter and dense, heavy cupcakes.
- Quick Tip: Forgot to take your eggs out? Place them in a bowl of warm (not hot!) water for 10-15 minutes. You can soften butter by cutting it into small cubes and letting it sit for 20 minutes.
2. The Art of Mixing: Don’t Overdo It!
This is the second-biggest mistake home bakers make. When you mix flour with a liquid, you develop gluten. A little gluten is good—it gives your cupcakes structure. But too much gluten, which comes from overmixing, is the enemy. Overmixing will turn your tender cupcake batter into a tough, bready, and dense disaster.
The golden rule is to mix just until the ingredients are combined. As soon as you no longer see streaks of dry flour, stop. It’s even okay if the batter looks a tiny bit lumpy. You want a light hand. Most recipes benefit from adding the dry and wet ingredients in alternating batches (e.g., 1/3 dry, 1/2 wet, 1/3 dry, 1/2 wet, 1/3 dry). This helps the flour hydrate gently without requiring you to overmix to get it all incorporated.
3. Sift Your Dry Ingredients
It might seem like a fussy, old-fashioned step, but sifting your dry ingredients (flour, baking powder, baking soda, salt, and even cocoa powder) does two crucial things. First, it breaks up any clumps, ensuring everything is evenly distributed. You don’t want to bite into a pocket of baking soda! Second, and just as important, it aerates the flour, making it lighter. This translates directly to a lighter, fluffier final cupcake.
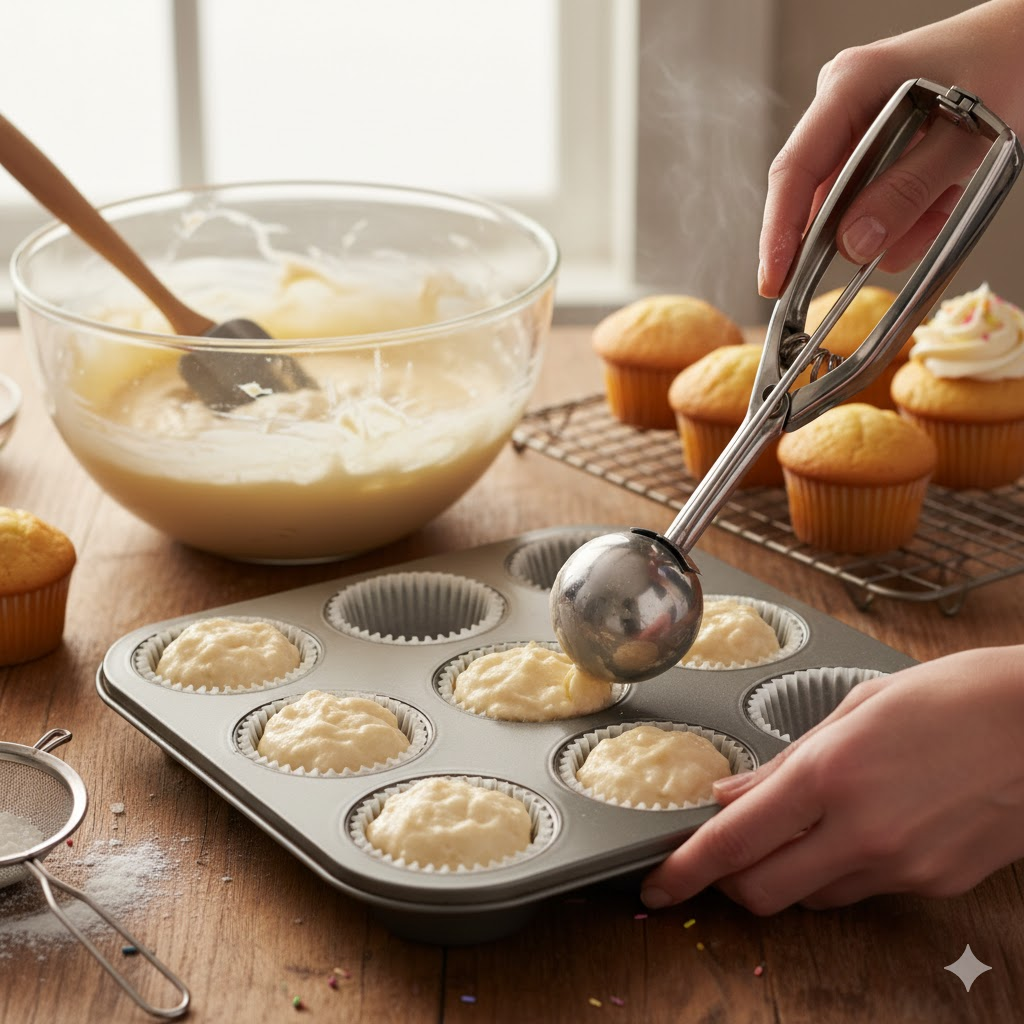
4. The 2/3 Full Rule
How you fill your cupcake liners matters. It’s tempting to fill them to the top, hoping for a giant cupcake, but this will backfire. A liner that’s too full will cause the batter to spill over the sides, creating a messy, sunken “mushroom” top that often sinks in the middle as it cools. On the flip side, under-filling will leave you with small, flat cupcakes.
The sweet spot is two-thirds of the way full. This gives the batter the perfect amount of space to rise up and create a beautiful, gently rounded dome. The easiest way to get consistent, perfectly-filled cupcakes is to use a spring-loaded ice cream scoop (a standard-size one is perfect for standard cupcake tins).
5. Trust Your Oven (and Your Eyes)
First, make sure your oven is fully preheated. Putting batter into an oven that isn’t at the correct temperature will mess up the leavening process and affect the final rise and texture. Many ovens are also inaccurate, so an inexpensive oven thermometer is a baker’s best friend.
Second, don’t peek! Opening the oven door in the first 15 minutes lets out a rush of hot air, which can cause your rising cupcakes to collapse and fall flat.
So how do you know when they’re done? Don’t just rely on the timer. Look for two key signs:
- The Spring-Back Test: Gently press your finger on the top of a cupcake. If it springs back immediately, it’s done. If it leaves an indent, it needs another minute or two.
- The Toothpick Test: Insert a wooden toothpick into the center of a cupcake. If it comes out clean or with a few moist crumbs, they are ready. If it comes out with wet batter, they need more time.
By following these five key steps—using room temperature ingredients, mixing gently, sifting, filling your liners correctly, and baking patiently—you are setting yourself up for success. Happy baking!

Post Comment