How to Bake a Flawless Layer Cake: A Step-by-Step Guide
Baking a layer cake requires precision at every step—from mixing the batter to the final chilling. While the recipe provides the ingredients, these foundational techniques ensure your cake layers are flat, moist, and stack perfectly every single time. Master these steps, and you’ll be building towering, professional-looking cakes in no time.
Step 1: Pan Preparation is the Foundation
Properly preparing your cake pans is non-negotiable for clean layers that release easily and evenly.
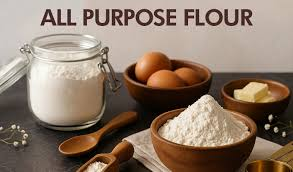
- Grease and Flour: Brush the bottom and sides of the pan with softened butter or a baking spray (like Baker’s Joy). Dust the pan with flour, turning the pan to coat all surfaces, then tap out the excess.
- Parchment Paper Circles: Cut a circle of parchment paper to fit exactly inside the bottom of the pan. This ensures the bottom won’t stick, even if the cake is delicate.
Step 2: Ensure Even Baking with a Kitchen Scale
The secret to perfectly level cake layers that bake at the same rate is making sure each pan contains the exact same amount of batter.
- Weigh the Batter: After mixing your complete batch of batter, place the bowl on a kitchen scale. Divide the total weight of the batter by the number of layers you are baking (usually two or three).
- Fill Equally: Spoon the calculated amount of batter into each prepared pan, weighing it as you go. This precision eliminates the guesswork and helps prevent doming and uneven rise.
Step 3: Cool Your Layers Carefully
Rushing the cooling process will lead to sticky, torn, or sunken layers.
- In-Pan Cooling (10 Minutes): When the cake layers come out of the oven, place the pans on a wire rack for exactly 10 minutes. This allows the cake structure to set and slightly pull away from the pan edges.
- Rack Cooling (Complete): After 10 minutes, gently run a knife around the edge of the pan. Invert the cake onto the wire rack, remove the pan, and peel off the parchment paper. Let the layers cool completely—at least one hour—before handling. Do not attempt to wrap or level a warm cake.
Step 4: Leveling and Trimming
To ensure a stable, straight cake, you must remove the dome and any dark edges.
- Trimming the Dome: Use a long, serrated knife (like a bread knife) or a dedicated cake leveling tool. Place the layer flat on a cutting board, eye-level with you. Using a gentle sawing motion, slice across the top to remove the dome and create a perfectly flat surface.
- Freezing for Firmness (Optional): If your cake is very soft or delicate, wrap the cooled layers tightly in plastic wrap and freeze them for 30 minutes to an hour. The firm texture makes them much easier to slice and handle without tearing.
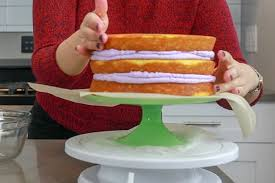
Step 5: The Crumb Coat (The Secret to a Clean Finish)
The crumb coat is a thin layer of frosting that seals in all loose crumbs, preventing them from mixing into your beautiful final layer of frosting.
- Stack and Fill: Place the bottom layer on your cake stand or serving plate. Spread your chosen filling evenly. Add the next layer and repeat.
- The Thin Coat: Apply a very thin, almost translucent layer of frosting all over the top and sides of the stacked cake. The goal is just to catch the crumbs.
- Chill: Place the crumb-coated cake in the refrigerator for at least 30 minutes (or up to 2 hours). This allows the frosting to firm up, locking the crumbs in place.
Step 6: The Final Frosting
Once the crumb coat is completely chilled and firm, it’s time for the final, thick layer of frosting.
- Apply Generously: Start by placing a large dollop of frosting on top. Use an offset spatula to spread it evenly over the top, then push the excess down the sides.
- Smooth the Sides: Work the frosting around the sides, adding more as needed. Use a bench scraper or offset spatula held perpendicular to the cake, pulling it straight around the sides to achieve a smooth, even finish.
- Final Chill: Chill the cake one last time (at least 15 minutes) before slicing or serving. This ensures the final frosting layer is set and sharp.

Post Comment